How to make amazing chocolate shapes
13 Apr 2021
Let your creativity shine by crafting chocolate into elegant, elaborate or quirky shapes
Chocolate shapes are the perfect piece-de-resistance for any dessert. With a dollop of delectable melted chocolate, you can create bespoke treats for any occasion.
You don’t have to be a maitre chocolatier to build mouthwatering masterpieces at home. So, whether you’re inspired by spectacular chocolate creations or just fancy your cacao fix in a different form, why not whip out your spatula and give it a go?
Decorate cakes with chocolate shapes
Melt-in-the-mouth chocolate shapes make excellent snacks. However, they also make ideal dessert toppers for special occasions. Customise cupcakes, add the final flourish to your muffins, or even top a towering wedding cake with chocolate shapes made by your own fair hands.
Learning how to make chocolate shapes gives you the versatility to get creative, personalise your bakes, and craft edible gifts your loved ones will adore.
1. Choose your chocolate
If you’re anything like us, you can’t get enough of delicious chocolate. Whether it’s sweet white, creamy milk, or decadent dark chocolate that tempts your tastebuds, each type makes delightful chocolate shapes.
Making the most sensational chocolate shapes starts with sourcing high-quality, cacao-rich ingredients.
“More cacao, less sugar” is a pivotal phrase around here. The cacao pod is where true chocolatey goodness comes from. Even our White Chocolate Batons contain 36% cacao butter for a lusciously smooth and flavoursome experience. Often, cheaper chocolate contains high sugar levels that mask cacao’s nuanced flavours. Lower-quality chocolate also tends to include vegetable fats and emulsifiers in place of cacao butter. As a result, it’s more gritty or waxy when melted.
Around 200g of your favourite chocolate is ideal for making chocolate shapes. We recommend solid bars or slabs, though buttons work too.
If you fancy something with an extra element of flavour vibrancy, why not try making zesty shapes with our Dark Chocolate Orange 70% Selector? Rich cacao meets uplifting citrus for a satisfying and refreshing finish.
2. Choose and draw your shapes
The world’s your oyster when it comes to designing your own chocolate shapes. From simple circles to intricate chocolate portraits, all you need to do is print or draw your pictures onto regular paper.
Once you’ve drawn your shapes, place the paper onto a baking tray and set aside.
3. Get your moulds and shape cutters

If you prefer preset shapes, there are an array of fun chocolate moulds available. Will you go for classic hearts and stars or quirky unicorns and dinosaurs. For a unique festive gift, why not make an advent calendar?
Alternatively, you can draw around cookie cutters with your chocolate concoction.
Whether you use chocolate moulds or shape cutters, make sure they’re completely dry. Any water residue can affect how your melted chocolate sets.
4. Chill a baking sheet
Before melting your chocolate, it’s also beneficial to chill your baking sheet in the freezer while you chop and melt your chocolate.
5. Chop the chocolate
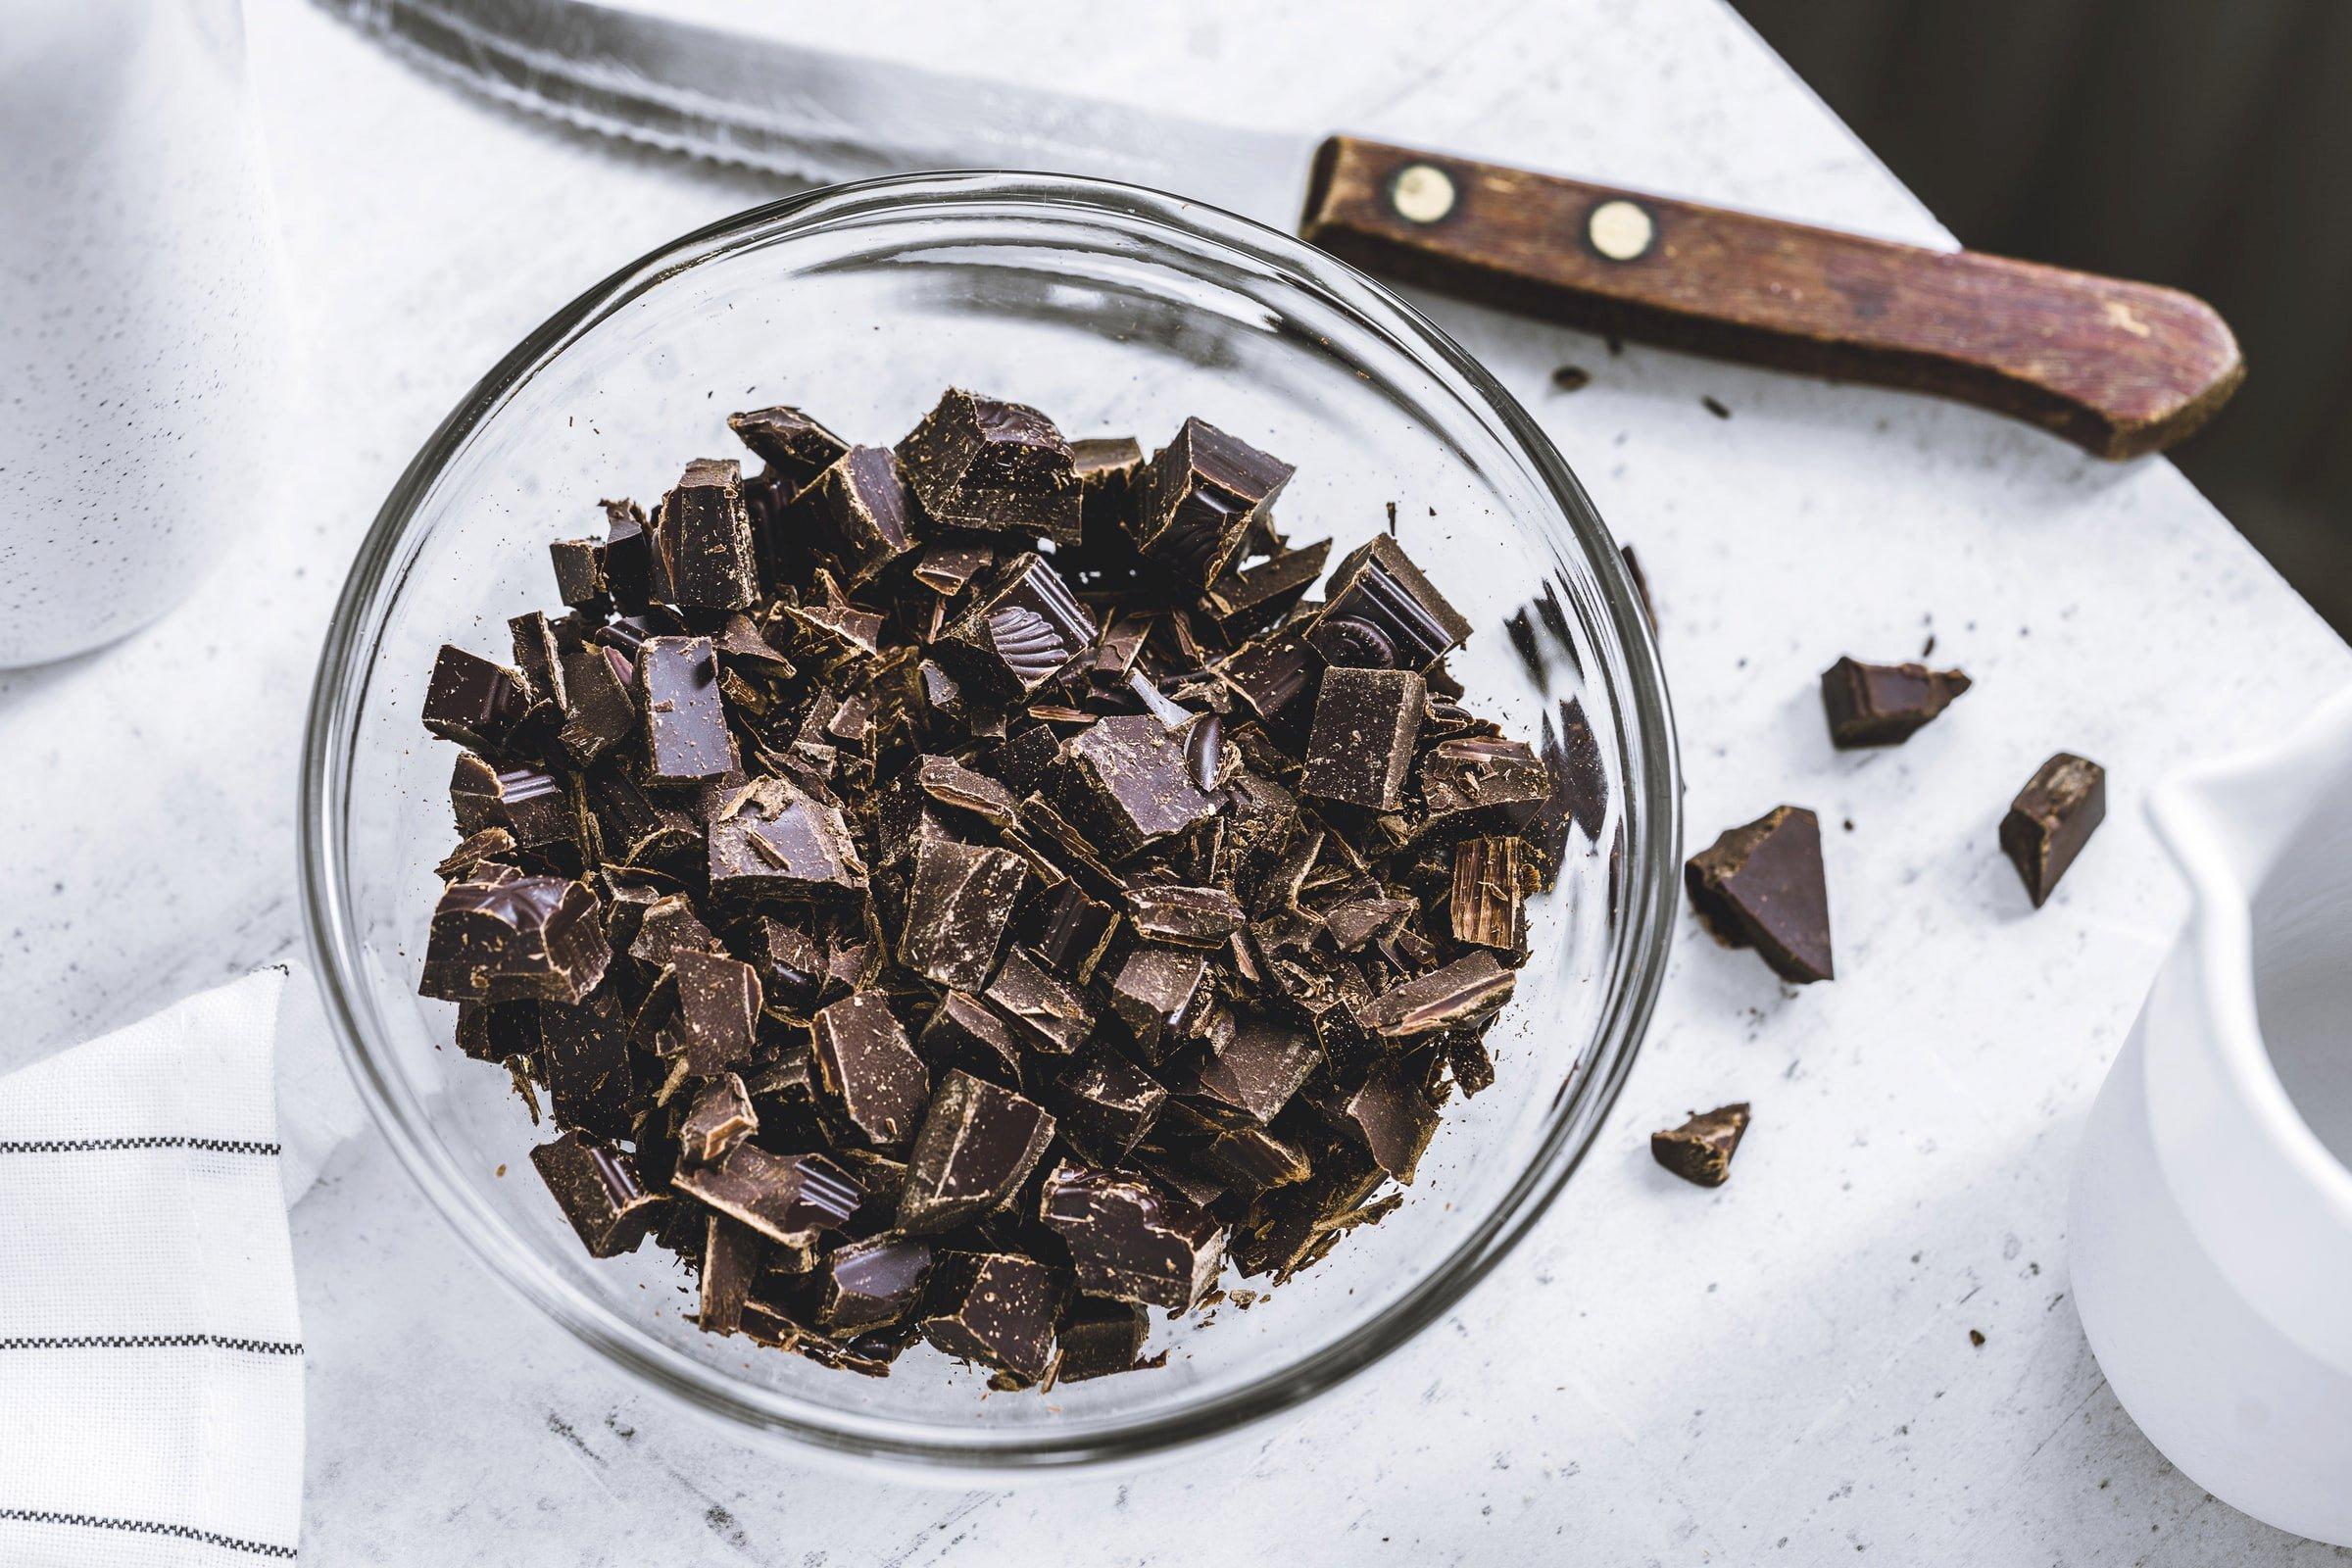
You’ll want to break your chocolate into small, similar-sized pieces so it heats and melts evenly.
You can either grate the chocolate or use a large, sharp knife to chop it at a diagonal angle. It’s helpful to start at the corners and work your way into the centre of the bar.
6. Melt and cool
What’s more enticing than rich, glossy melted chocolate?
You can use a heat-proof bowl over a pan of water, or a microwave. If microwaving, slow and steady is the key. Heat the chocolate at 15-second intervals on a low setting, and stir between blasts.
For the pan method, simmer a few inches of water, then take off the heat. Let it cool slightly, then nestle a bowl in the pan and add the choc, allowing it to melt and release its enticing aroma.
Whichever technique you choose, stop heating once the chocolate is about 80% melted. Stir the remaining pieces with a spatula and watch them blend into the decadent pool. Heating too quickly or at too high a temperature can scorch your chocolate.
Once all your chocolate has melted and you’ve given it a good stir, let the deliciousness cool slightly.
7. Add liquid
After the chocolate has cooled a few degrees, add a few drops of water or alcohol (schnapps or vodka work well). It’s vital to cool the chocolate first. Adding cold liquid to hot chocolate will cause parts of the chocolate to cool too quickly and crack.
To check your mixture is the right consistency, let it drip off a spoon and draw a figure eight on a piece of baking paper. The chocolate should flow in a steady stream and hold its shape once on the paper.
8. Create a cornet
Icing bags or squeeze bottles are ideal tools for piping your chocolate shapes. However, you can also make a piping bag or ‘cornet’ out of a triangular piece of baking parchment. Roll the triangle into a cone shape and snip a tiny hole in the corner to release the chocolate.
Spoon your melted chocolate into the cornet, bag, or bottle before it starts setting, and get ready for the fun bit!
9. Make shapes on the chilled baking sheet
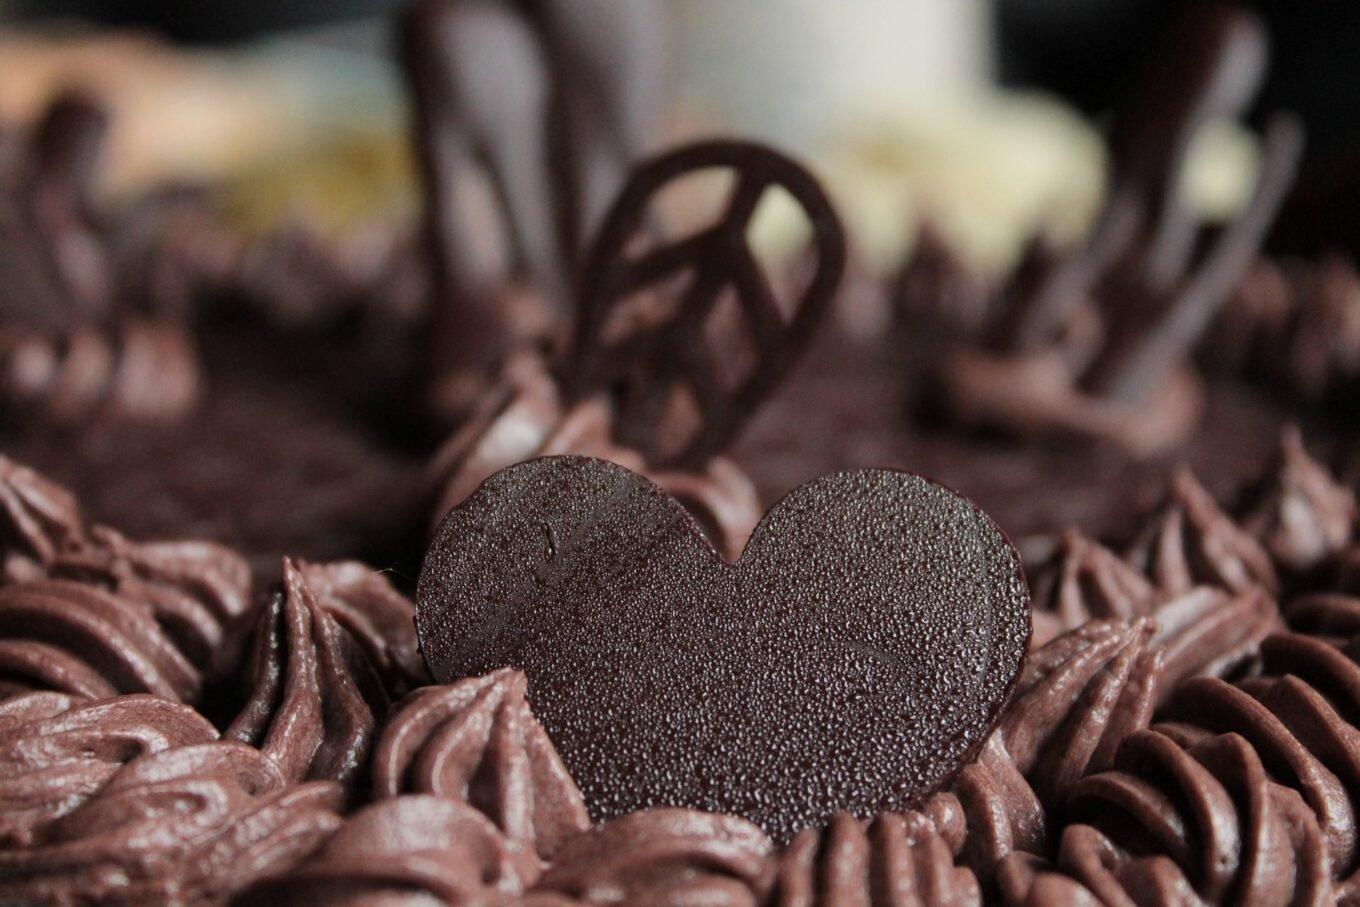
Next, place your chilled baking parchment over your designs on the baking tray.
Trace the pictures with your melted chocolate, squeezing gently on the cornet. Don’t worry if the first few are a bit wobbly! You can also let your imagination go wild and draw abstract chocolate shapes freehand.
If using moulds, pour your mixture into the shapes and tap gently to release any bubbles. For extra garnish, you could take inspiration from our Eton Mess Slab Selector and add a delicate dusting of freeze-dried strawberries to your shapes.
10. Store in the fridge
Once you’re happy with your chocolate shapes, refrigerate for at least an hour. They will be ready to add to cakes, muffins, and your tum, once they’re firm to the touch.
If learning how to make chocolate shapes has piqued your culinary curiosity, you can find more exciting recipes in our book, A New Way of Cooking with Chocolate.
Alternatively, you can skip to the good bit with our ready-made chocolate collection.